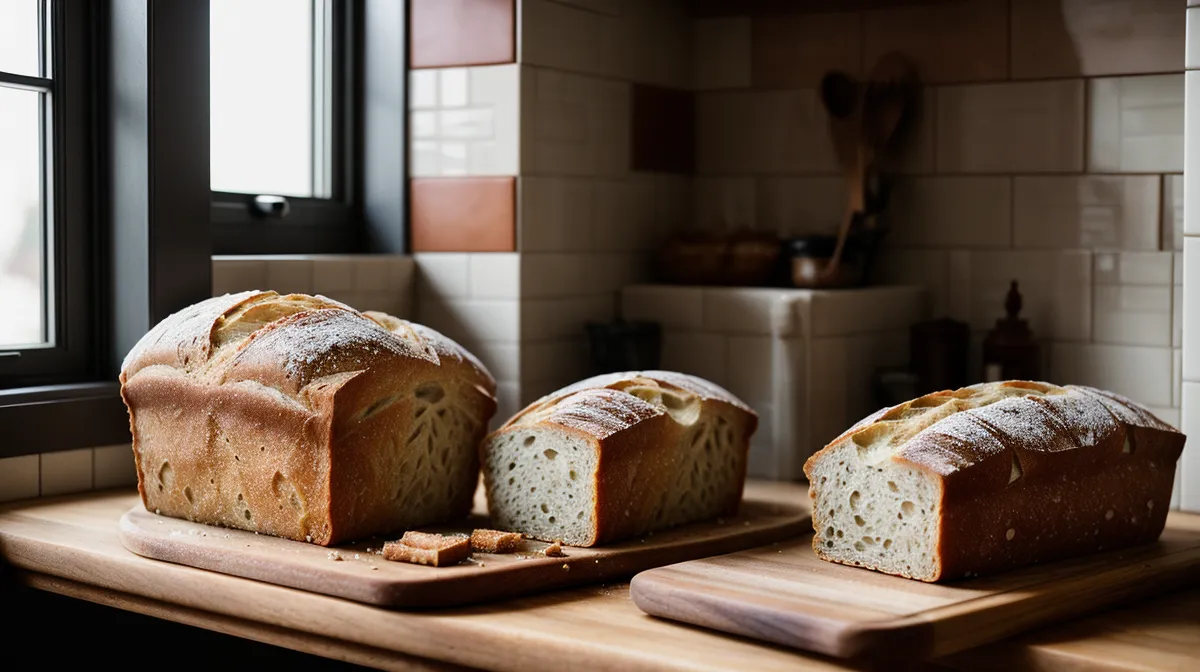
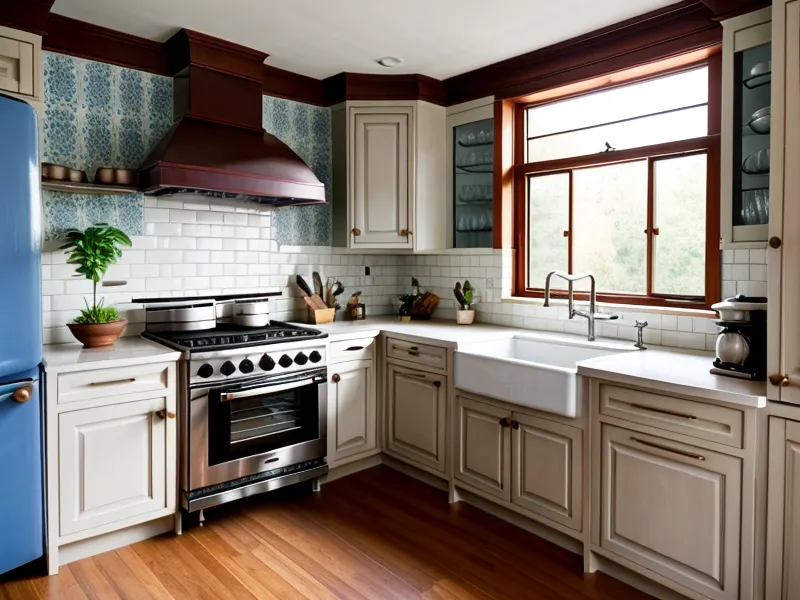
Standing in my Madison kitchen on a snowy evening in mid-December, I realized my 'good enough' bread kit was failing me. The crust on my weekly boule came out pale and uneven, a sad, dusty beige that looked more like a grocery store roll than the artisanal masterpiece I’d envisioned when I started my Saturday sourdough routine. I had the starter, I had the flour, but my gear was working against me.
It has been quite a journey since that first Tartine loaf in March 2020. Back then, I was just trying to survive pandemic boredom. Fast forward to the late autumn of 2025 and into the spring of 2026, and my 1920s Craftsman bungalow kitchen has become a full-blown testing lab. I’m not a chef, and I didn’t go to culinary school; I’m just a freelance copy editor who keeps receipts and pays very close attention to how a pan settles into its weight after a year on the cooktop. After about six months of weekly bakes in this current cycle, I’ve finally figured out which tools are essential and which ones are just expensive clutter.
The Myth of the Specialized Bread Vessel
For a long time, I thought I needed every single gadget marketed to the sourdough community. I bought the fancy baskets, the specialized lames, and the expensive liners. But by late February, during a particularly brutal cold stretch here in Wisconsin, I started stripping my process back to the basics. I found that the most important factor in a great loaf isn’t a specialized 'bread' tool—it’s heat retention.
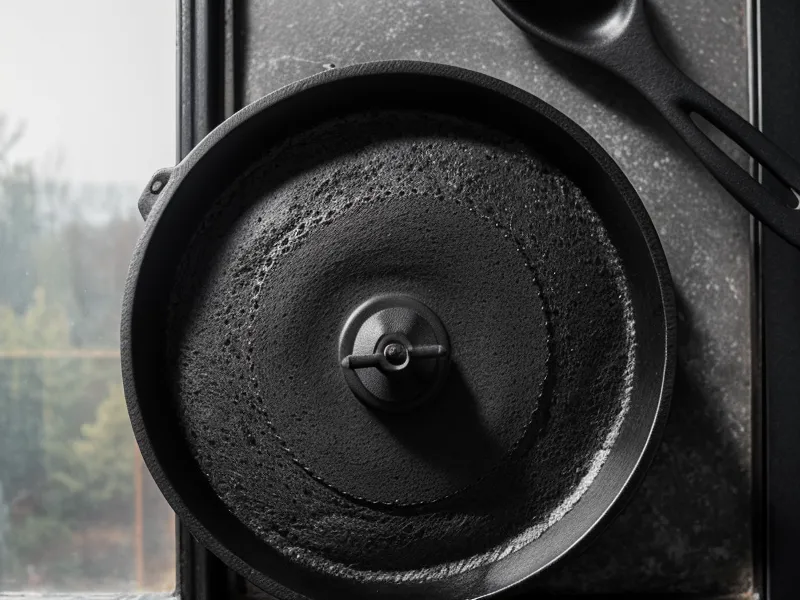
I spent years using a standard 5.5 quarts Dutch oven, the kind of industry standard size you see from Le Creuset or Staub. It’s a workhorse for Sunday family pasta night, but for bread, it has its limits. When I compared the thermal mass of my old Lodge vs. the specialized Challenger Bread Pan, the difference was undeniable. The Challenger is a beast of black cast iron designed specifically to trap steam, but here’s the truth: if you already own a heavy enameled Dutch oven, you’re 90% of the way there. The key isn’t the brand; it’s the ability to hold a steady temperature when you’re pushing your oven to its limits.
I typically preheat my cast iron at a maximum oven temperature for cast iron of 500°F. If you’ve ever done this, you know the specific, sharp smell of toasted rice flour and scorched wheat that hits when lifting the lid of a 500-degree Dutch oven. It’s the smell of success, but it’s also a warning. I’ve learned the hard way that thermal shock can crack enameled cast iron if a cold loaf is placed in a pot preheated empty for too long. If you're curious about the specifics of that transition, you can read my thoughts on the Best Bread Pan for Sourdough After Using the Challenger Breadware, where I dig into whether the specialized shape is actually worth the counter space.
Precision Over Prestige: The $10 Heroes
The turning point in my baking didn’t come from a $400 stand mixer (though I love my KitchenAid Pro 5 Plus for other things). It came from a high-precision scale and a simple $10 plastic bench scraper. In the sourdough world, we talk a lot about the standard sourdough hydration range of 70% to 85%. When you’re working with 85% hydration, the dough is basically a sentient puddle. Without a good bench scraper, you’re just going to end up with flour-paste up to your elbows on a Wednesday morning when you’re trying to squeeze in a stretch-and-fold between client calls.
I used to eyeball the water. Big mistake. Sourdough is a chemistry experiment that you eventually get to eat. A scale that measures in single grams is non-negotiable. I don’t care if it’s a fancy brand or something from a big-box store, as long as it doesn’t shut off automatically after 30 seconds of inactivity (the absolute bane of my existence). I also stopped using my expensive All-Clad measuring cups because, frankly, volume is a lie when it comes to flour density. If you’re still using cups, you’re not baking; you’re gambling.
Speaking of things that are worth the money, I’ve found that my choice of stand mixer really only matters during the initial mix. Once the fermentation starts, it’s all about the hands. But if you are using your mixer for the heavy lifting, make sure you know how to maintain it. I’ve seen too many people burn out their motors trying to knead a double batch of stiff rye.
The Proofing Basket Trap: A Contradictory Discovery
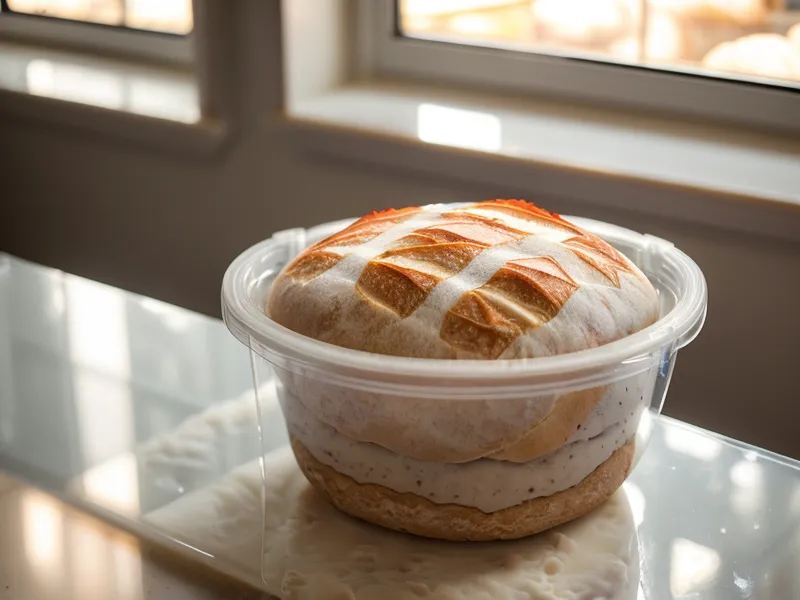
Here is where I diverge from almost every food blogger out there: Stop buying expensive rattan proofing baskets. For a long time, I was a devotee of the 9 inches rattan banneton. They are preferred because they allow the dough to breathe and create that classic flour ring pattern that looks so good on Instagram. But I experienced the absolute frustration of a high-hydration dough sticking to a cheap linen liner, tearing the skin off the loaf and ruining the tension I’d spent six hours building.
One humid morning in early June, after a particularly sticky disaster, I reached for a stack of large plastic deli containers I’d saved from a local takeout spot. I gave them a light dusting of rice flour and plopped the dough in. To my surprise, the structure was superior. The smooth plastic doesn't wick moisture away as aggressively as rattan, which, for high-hydration loaves, actually helps maintain a supple skin that’s easier to score. Plus, you can see the fermentation bubbles through the sides of the container, which is a game-changer for timing your bulk ferment.
If you love the rings, buy the baskets. But if you want a tool that removes the friction from your workflow, the humble deli container is the winner. It’s also a lot easier to clean than a wicker basket that eventually starts growing its own ecosystem if you don't dry it out perfectly.
The Tools That Actually Make the Cut
After about six months of weekly bakes, my 'must-have' list has shrunk significantly. I’ve realized that a $700 Vitamix earns its keep for smoothies, but it has no place in my sourdough routine. Similarly, I don’t need a specialized 'bread' knife when my serrated offset knife does the job better. What I do need are tools that handle the heat and the stickiness without complaining.
- A Lodge Combo Cooker: It’s roughly fifty bucks and performs better than many $300 French ovens because you can use the shallow lid as the base, making it much easier to load your dough without burning your knuckles.
- Rice Flour: Not a tool, but essential. It’s like Teflon for dough. I keep mine in a shaker on the counter next to my Pyrex bowl.
- A Dedicated Spray Bottle: To add extra steam inside your Dutch oven. It’s the secret to that glassy, crackly crust.
- A Plastic Bench Scraper: Flexible enough to get every bit of dough out of the bowl, stiff enough to shape a boule.
Who should buy the premium gear? If you are baking three or more loaves every single Saturday and you find yourself frustrated by the limitations of a round pot, then yes, look at the Challenger or a dedicated bread oven. But if you’re a hobbyist like me, someone who just wants a decent crust and a crumb that isn't gummy, the mid-tier gear is often more than enough. I’ve spent a lot of money learning that a more expensive tool won’t fix a weak starter or a rushed bulk fermentation.
Final Reflections from the Lab
Looking at my current rotation of gear, I’ve realized that the 'best' tools don't bake the bread for you; they just remove the friction that makes you want to quit. Sourdough is hard enough without your equipment fighting you. Whether it’s the way the dough releases perfectly from a plastic container or the way my heavy cast iron holds onto the heat of a 500-degree oven, these tools are there to support the process, not replace the skill.
I still make mistakes. I still occasionally forget to flour the liner or miscalculate the hydration. But at least now, when I sit down on a Sunday morning with a thick slice of bread toasted and slathered in salted butter, I know that my tools are working for me. And if you’re worried about keeping your other premium gear in shape while you’re covered in flour, you might want to check out my tips on How to Clean All-Clad Pans to Keep Stainless Steel Looking New, because a messy kitchen is a sign of a good bake, but a stained pan is just a bummer. Keep your tools clean, your oven hot, and your expectations grounded in the reality of home cooking.